Most people who email me about robot mowers ask the wrong question. They want to know which mower to buy. The mower matters less than the install, and the install comes down to four things: where the dock sits, how the machine learns the edge of the lawn, how often it runs, and whether the dock still has power in September. Robot mower setup for small lawns is a weekend of measuring and a season of small corrections, not a purchase decision.
That is what this guide is. It is the order I work in on client properties, aimed at lawns in the 1,000 to 1,600 square foot range, where a lightweight camera-guided machine makes far more sense than a heavy wire-buried unit built for an acre. I have two pieces of hardware to talk about, and neither one is a gadget. One is the mower. The other is the power supply that keeps a bigger mower's dock alive, because a dead dock turns any robot into a very expensive lawn ornament.
If your lawn is small and open, you can skip most of the hard work. If your lawn is small and cluttered, the hard work is the whole job. Either way, the sequence below is what keeps a mower running past the first month.
Why you should trust me
I spent 15 years installing lawns as a landscape designer before I switched to reviewing and installing robot mowers. I have put more than 30 of them into client yards around Minneapolis, from postage-stamp city lots to a half-acre with a ravine at the back. I have run six different mowers through two full Minnesota seasons, which means I have done the winter storage, the spring reinstall, and the week in May when the grass grows four inches overnight and the robot wakes up to a jungle.
I keep a string-and-stakes map of every install, and I keep notes on what failed. The mulberry-leaf clog of 2024 is in those notes. So is every dock that lost power mid-season and every app that forgot its map after a firmware update.
What I have not done is run the YARDCARE V100 through a full season in my own yard. I am not going to pretend otherwise. What I can tell you is what the listing says, what the small-lawn class demands, and where camera navigation tends to break down, because I have watched that happen on other machines.
How I picked these two
For the mower, I picked for the small-lawn class specifically. A lawn under 1,600 square feet does not need a heavy machine with a buried perimeter wire and a four-figure install bill. It needs something light, quick to deploy, and honest about its coverage number.
For the second product, I picked for the failure that ruins the most seasons: power. The dock is the mower's entire support system. When the charging supply dies in July, you are back to pushing a gas mower while you wait for a replacement, and the grass does not wait with you.
I did not bench-test either unit. I read the listings, I matched them against what the class requires, and I checked them against the install problems I see every spring. Where a claim comes from the product name or the listing, I will say so.
The hardware that decides the install
Everything else in this guide is technique. These two items set the ceiling on how well that technique can work.
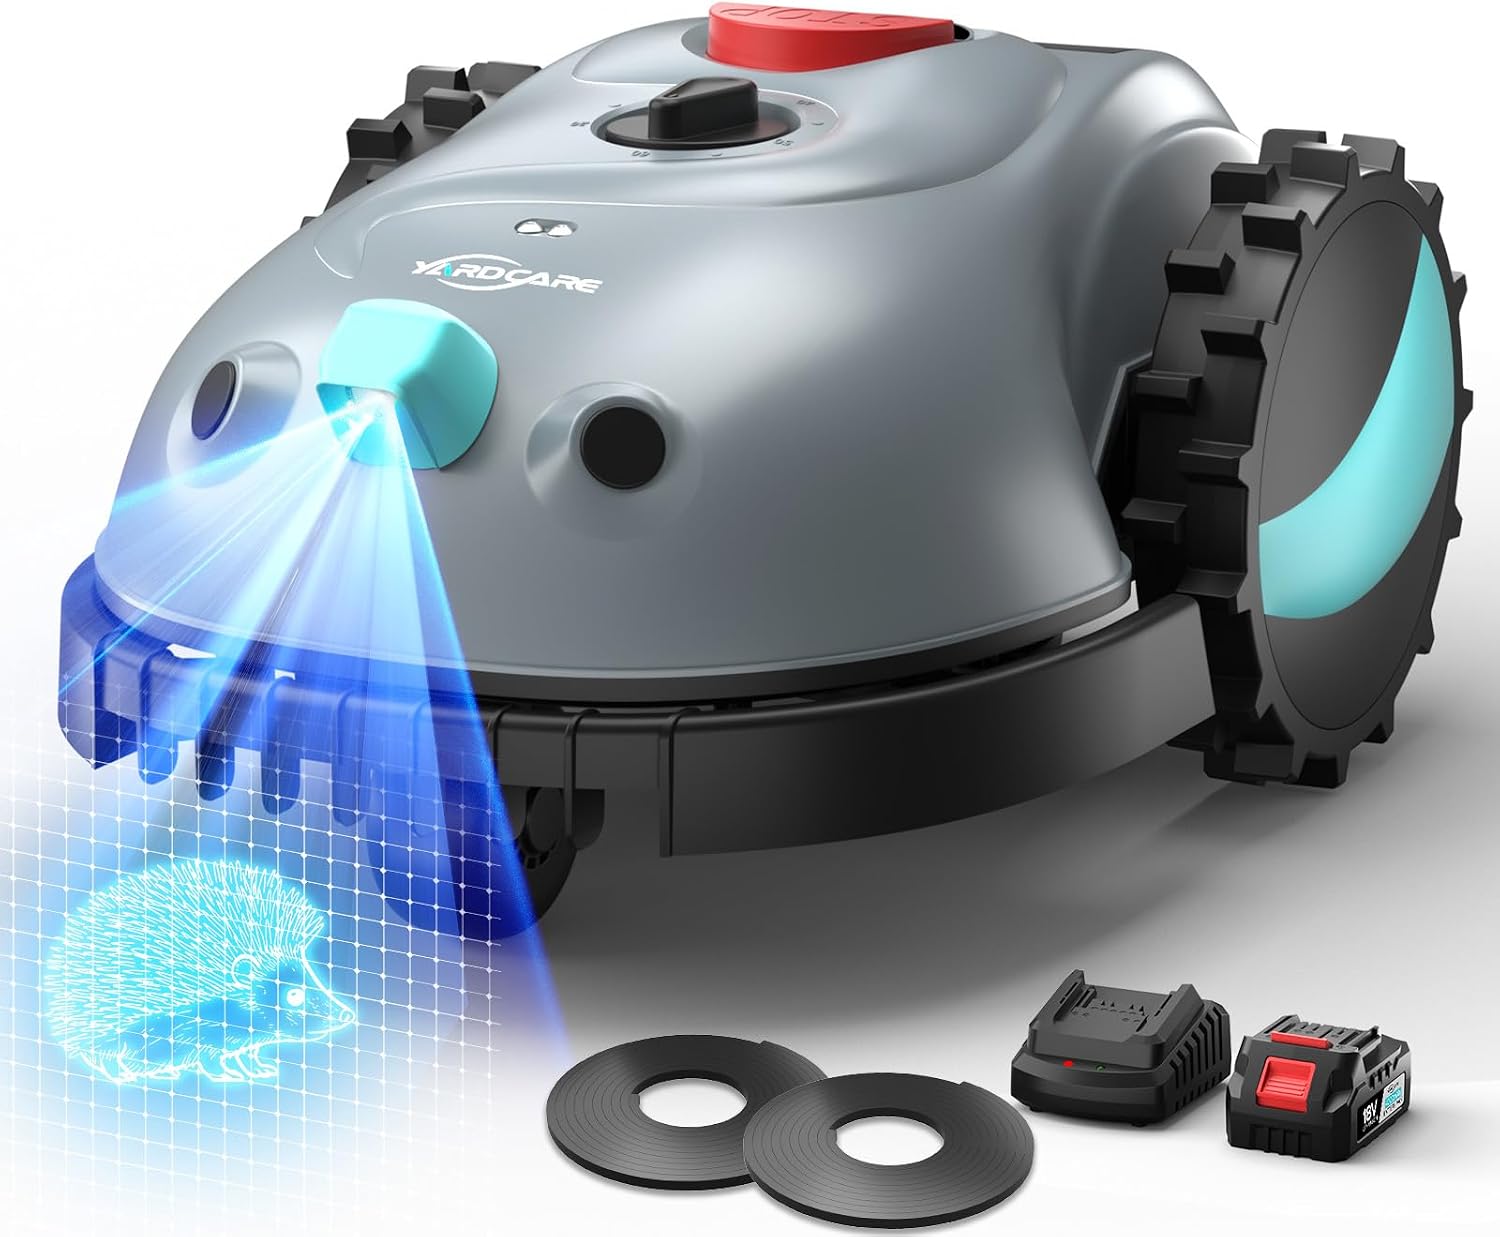
The mower: YARDCARE V100 Robot Lawn Mower, HD Vision for Small Lawns Up to 1600 sq ft
 Visit on Amazon →
The name on this one is the spec sheet, so let me read it the way I read a client's yard. HD vision means the machine navigates by camera instead of by perimeter wire. Up to 1,600 square feet means it is built for a small lawn, roughly a quarter of my own front yard, not for an estate.
The vision part is the reason I would start here for a small, open yard. Perimeter wire is the real cost of a robot mower, both in money and in weekends. It is the part that gets nicked by an edger, corroded by a splice, and dug up by a dog. A machine that maps with a camera deletes that entire category of work from the project. You unbox it, you let it learn the lawn, and you are done.
The trade-off is honest and worth stating plainly: camera navigation needs a lawn it can see. Deep shade under a mature maple, a long narrow side yard, and a strip that runs behind a shed are the places vision mowers get confused, and those are exactly the places wire does not care. If your small lawn is open and bright, vision is the easier path. If it is a maze of beds and shade, plan for wire or expect to rescue the machine more often.
Check current Amazon price before you commit, and measure your actual turf area first. A 1,600 square foot rating assumes a lawn shaped roughly like a lawn, not a corridor with three islands in it.
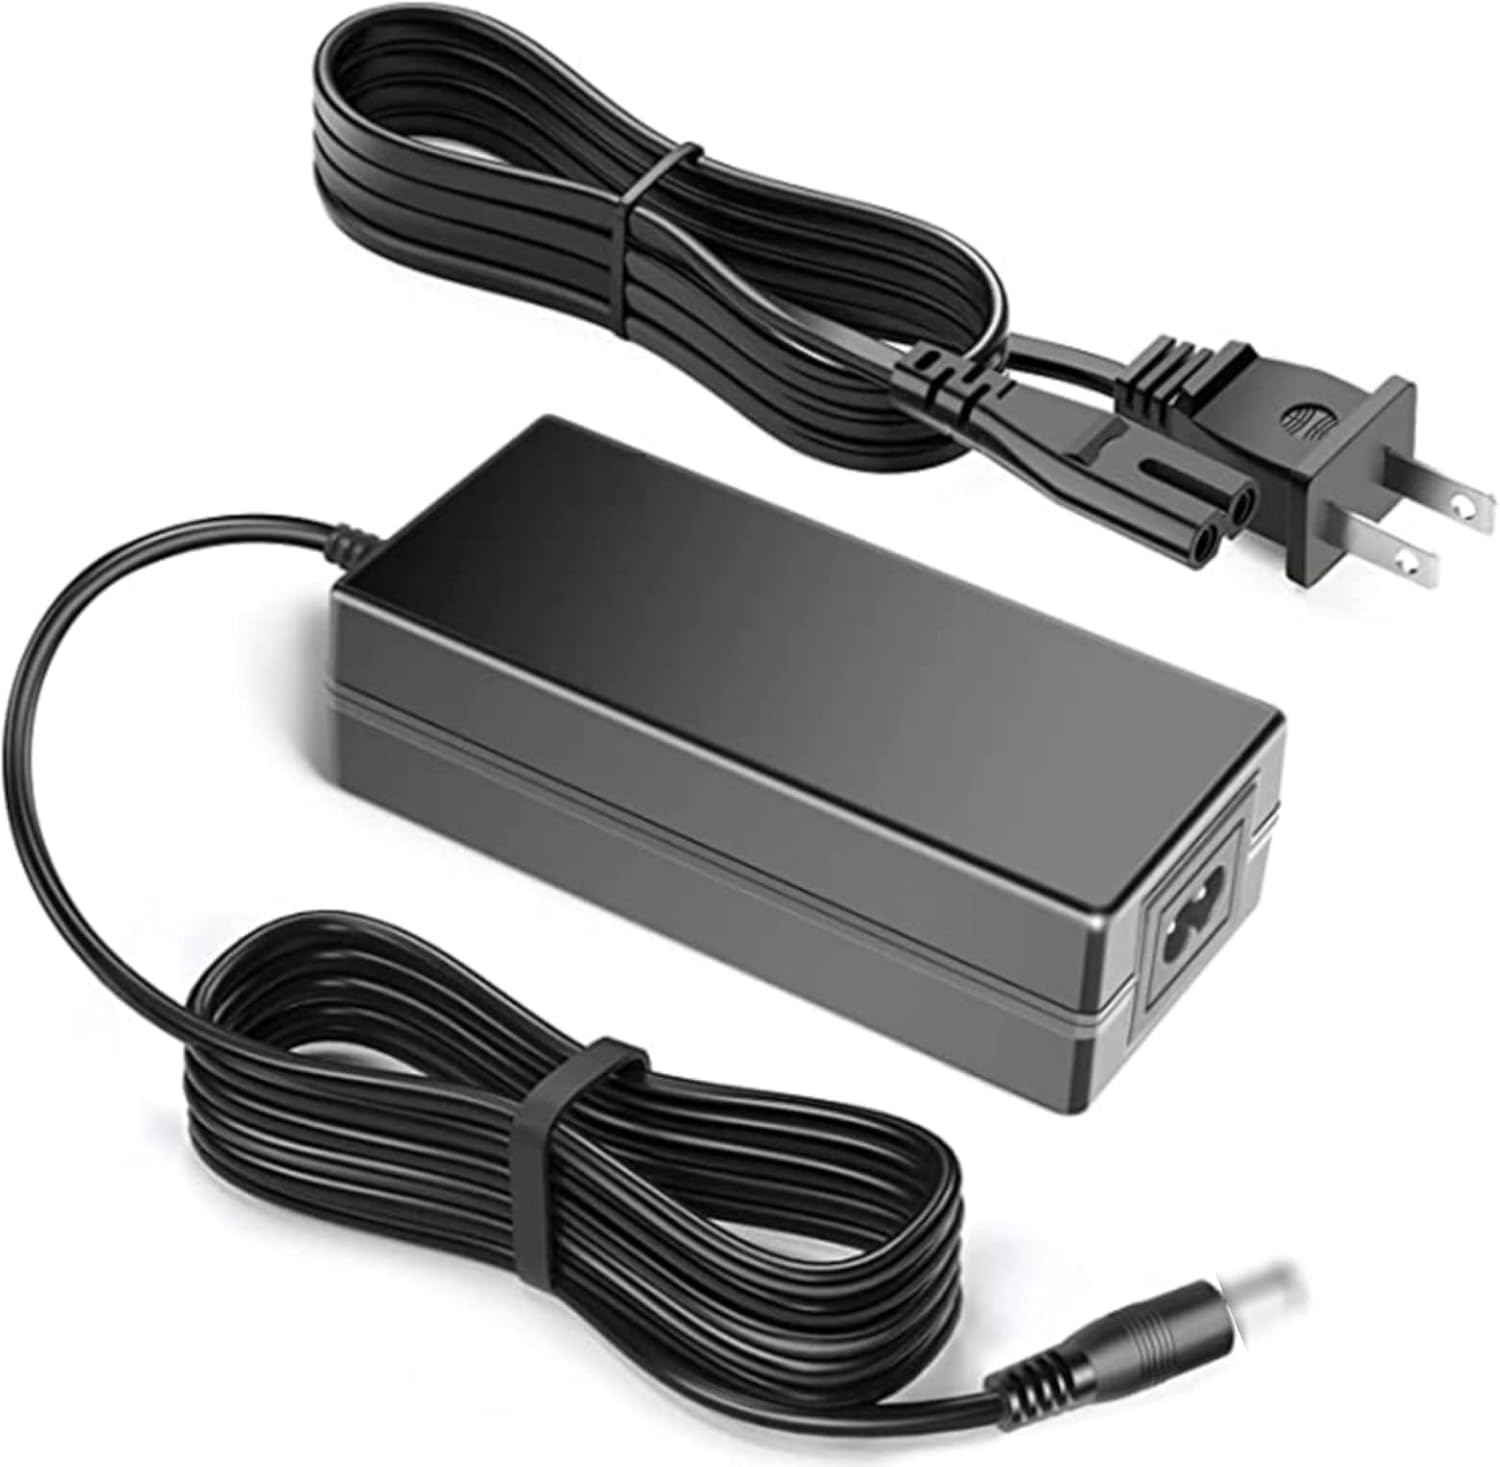
The power supply: Adapter for Charging Mammotion LUBA 2 AWD 3000X 3000HX 5000X 5000HX Robot Lawn Mower 21.6V 12Ah Battery Power Supply Cable Cord
 Visit on Amazon →
This is a charging power supply for the Mammotion LUBA 2 AWD line, listed for the 3000X, 3000HX, 5000X, and 5000HX models, rated 21.6V 12Ah. It is not a mower. It is the cord and supply that feed the dock, and if you own one of those LUBA 2 AWD machines, it is the part you want sitting on a shelf in the garage before you need it.
Here is why it belongs in an install guide. On every robot mower, the dock is the single point of failure that homeowners never plan for. The blades wear, the wheels clog, the app misbehaves, and all of that is survivable. A charging supply that quits in the middle of July is not survivable, because the mower cannot work at all. It just parks itself and waits for a part.
I have watched a client lose three weeks of mowing to a failed dock supply in peak growth season. Three weeks in June in Minnesota is a meadow. A spare supply is cheap insurance against that specific disaster, and it is the kind of thing you buy while you are already thinking about the install instead of during an emergency.
Check current Amazon price, and confirm your exact model against the compatibility list before ordering, because the LUBA 2 AWD family spans several sizes and this supply is listed for four of them.
Step one: measure the lawn before you unbox anything
Get a tape and a roll of string. Stake out the actual turf, not the property line. Write down the square footage, then subtract the beds, the driveway, the patio, and the shed footprint. That number is what you compare against any coverage claim, and it is almost always smaller than the homeowner guessed.
While you are out there, note three things on the same page: where the lawn is shaded for most of the day, where it narrows to less than the machine is wide, and where the dog leaves things. Those three notes predict 90% of the rescues you will do in the first month.
Step two: place the dock like it matters
The dock sets the whole geometry of the job, so do not put it wherever the extension cord happens to reach. Pick a spot that is level, out of the mowing path, and within reach of power without a cord running across the lawn.
Two rules I do not break. First, the approach to the dock should be straight and flat for several feet, because a machine that has to turn into a slope to park will eventually miss. Second, keep the dock out of the worst afternoon sun if you can. Heat is unkind to charging electronics, and shade over the dock costs you nothing.
If the supply cord will not reach your chosen spot, that is a power problem, not a mower problem. Solve it with the right supply or a properly rated outdoor outlet, never with a daisy chain of household extension cords.
Step three: set the cutting height high on day one
The most common first-week mistake is setting the deck low because the lawn looks shaggy. Do not. Cut no more than one third of the blade height in a single pass, which is the oldest rule in turf care and the one that keeps a robot from scalping.
Start at the top of the range, let the mower run, and drop the height by a notch every few days until you reach your target. A robot cutting daily at a moderate height produces a healthier lawn than one cutting weekly at a low height, and it also stops the machine from choking on long clippings.
Step four: teach the boundary, then trust it slowly
On a vision-based mower, the first run is the important one. Walk the perimeter with the machine on its slowest setting and let it see the edges. Move the hose, the toys, and the dog bowl out of the way first. Every obstacle you leave in the path on day one becomes a false boundary the machine remembers.
On a wire-based machine, the equivalent step is the layout. Keep the wire the recommended distance from walls and beds, avoid splices wherever a single run will do, and treat every splice as a future failure point. Corners want gentle turns, not sharp ones. This is the part of the install that costs the weekend, and it is the part that decides whether the mower ever gets confused.
Step five: build the schedule around growth, not convenience
Mowing frequency beats mower quality every single time. A modest machine running daily outperforms an expensive one running weekly, because daily cutting keeps clippings short enough to mulch back into the turf and never lets the grass get ahead of the blade.
Set the schedule for your fastest-growing month, not your average one. In a Minnesota spring, that means daily. In the slow weeks of July, you can back it off. The point is to let the robot do the boring repetition, which is the only thing it is genuinely better at than you are.
Step six: expect two weeks of rescues
Your mower will get stuck in the first two weeks. It will find the one soft spot by the downspout, it will try to climb the one slope you did not flag, and it will wrap itself around a dog toy you swore you picked up. This is normal, and it is not a reason to return the machine.
Every rescue tells you something. Log the location, fix the cause, and move on. After two weeks, the rescue rate drops off a cliff, because the lawn stops surprising the machine and you stop surprising yourself.
The Minnesota problem: leaves, mud, and winter
Two seasons in this climate taught me that the mower is not the weak link. The yard is. Wet grass on a slope is where every slope rating I have ever seen falls apart, so keep the machine off a saturated lawn rather than testing its traction. Fall leaves will clog a deck faster than tall grass, so run more often in October, not less.
Winter storage is simple and worth doing properly. Clean the deck, remove the clippings, and follow the manual for battery storage. Do not leave a mower parked on a dock in an unheated garage through a Minnesota January and expect the battery to forgive you.
What this all costs
The mower is the line item, and the small-lawn class is the affordable end of the market. The charging supply is a small fraction of that, which is exactly why a spare belongs in the budget instead of in an emergency order. Everything else on this list is free: measuring, staking, mapping, and the two weeks you spend learning your own lawn.
Check current Amazon price on both, and run the cost per season over the years you plan to keep the machine. A robot that runs daily for five seasons is doing a lot of mowing for the money.
What can go wrong
Camera navigation struggles in heavy shade and narrow corridors, so a vision mower on a shaded lot will need more attention than the listing suggests. RTK mowers have the mirror problem: tree cover kills the signal, which is why I still install wire for clients who want to stop thinking about it.
Slope ratings are marketing until proven on wet grass. App features are a bonus, not a foundation, and any firmware update can rearrange your schedule, so keep a paper copy of your settings. Blade life is the hidden cost nobody budgets for, and dull blades tear grass instead of cutting it.
None of that is a reason to skip the install. It is a reason to do the install in the right order.
The short version
Measure the lawn, place the dock where it can be reached and where a machine can park straight, set the height high and lower it slowly, teach the boundary carefully, schedule for your fastest-growing month, and keep the power side of the system in good shape. Do those six things and a small-lawn robot stops being a project and starts being the thing that quietly mows your yard while you do something else.