Wire-free robot mower setup looks like the easiest job in lawn care. No trenching, no wire stakes, no splice kits that corrode by August. You drop the dock, walk the mower around the edge of the yard once, and the RTK receiver plus the vision camera take over from there.
That is mostly true, and it is also where homeowners get stuck. I have installed more than 30 robot mowers for clients around Minneapolis, and wire-free units fail in the same two places every time: the dock has no clear view of the sky, or the boundary was mapped in a hurry on a windy afternoon. Everything after that is scheduling.
I keep a string-and-stakes map of every install, and I have run six different mowers through two full Minnesota seasons, including winter storage, spring mud, and the great mulberry-leaf clog of 2024. This is the order of operations I use now for RTK and vision mowers, plus the two units I would put on a normal suburban lot.
Why you should trust me
I spent 15 years installing lawns before I switched to reviewing robot mowers, so I came to this from the dirt side, not the gadget side. I have set up wire systems, RTK systems, and hybrids, and I have watched all three fail in ways the spec sheets never mention.
My own lot is 0.4 acres with a tricky slope, a garden bed I care about, and a dog that chases anything that moves. That combination tests a mower harder than a flat showroom lawn. I also install for clients, which means I hear the complaints six months later when the app has pushed a firmware update and the map has gone sideways.
The short version of what I have learned: the install is the product. The mower is just the robot that executes your map.
What wire-free actually means
Wire-free is not one technology. It is two, and they behave differently.
RTK uses a fixed reference signal and satellites to place the mower within a few centimeters. It is elegant, it needs no buried wire, and it is fragile under dense canopy. A mature maple or a tight row of arborvitae will degrade the fix, and the mower will slow down, wander, or stop.
Vision AI uses a camera and onboard processing to read the lawn edge and avoid obstacles. It handles the shaded areas and the odd garden gnome. It is not a substitute for a good boundary map; it is the safety net.
The practical result is that wire-free mowers want open sky at the dock and a mapped boundary that follows the real edge of the lawn, not the edge you wish you had. If your yard is a shaded half-acre under mature trees, a hybrid system with a wire backup is still the honest answer. If your yard is a sunny quarter-acre with a fence and a couple of beds, wire-free is genuinely easier, and setup takes an afternoon.
The two mowers this setup applies to
These are the two units I would hand a client with a normal suburban lot. Both are wire-free, both use RTK plus vision, and both follow the same install order below.
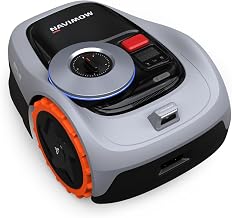
Best for a small city lot: Segway Navimow i105N Robot Lawn Mower Perimeter Wire Free 1/8 Acre RTK+Vision Robotic Lawnmower, AI-Assisted Mapping, Virtual Boundary, APP Control, 58dB(A) Quiet, Multi-Zone Management
 Visit on Amazon →
The Navimow i105N is the one I recommend for the classic quarter-acre lot with a fence and a couple of garden beds. The 1/8 acre coverage rating means it is not going to eat a big property, but on a small city lot that is a feature, not a limit: a smaller deck handles tight gates better, and the multi-zone management lets you split the front, the back, and the side strip so the mower is not wandering the whole yard to reach a corner.
The 58 dB(A) rating matters more than people expect. That is quiet enough to run at 6 a.m. without waking the neighbors, which is the whole point of scheduling a daily cut. The AI-assisted mapping and virtual boundary are what you use to keep it out of the beds without laying a single stake.
Flaws but not dealbreakers: The coverage ceiling is real. If your lawn is closer to a third of an acre, you will spend the summer watching it work in zones instead of finishing in one run. Buy for the lawn you have, not the lawn you are planning.
Homeowners on a fenced quarter-acre who want the mower out of sight and out of earshot will be happy here.
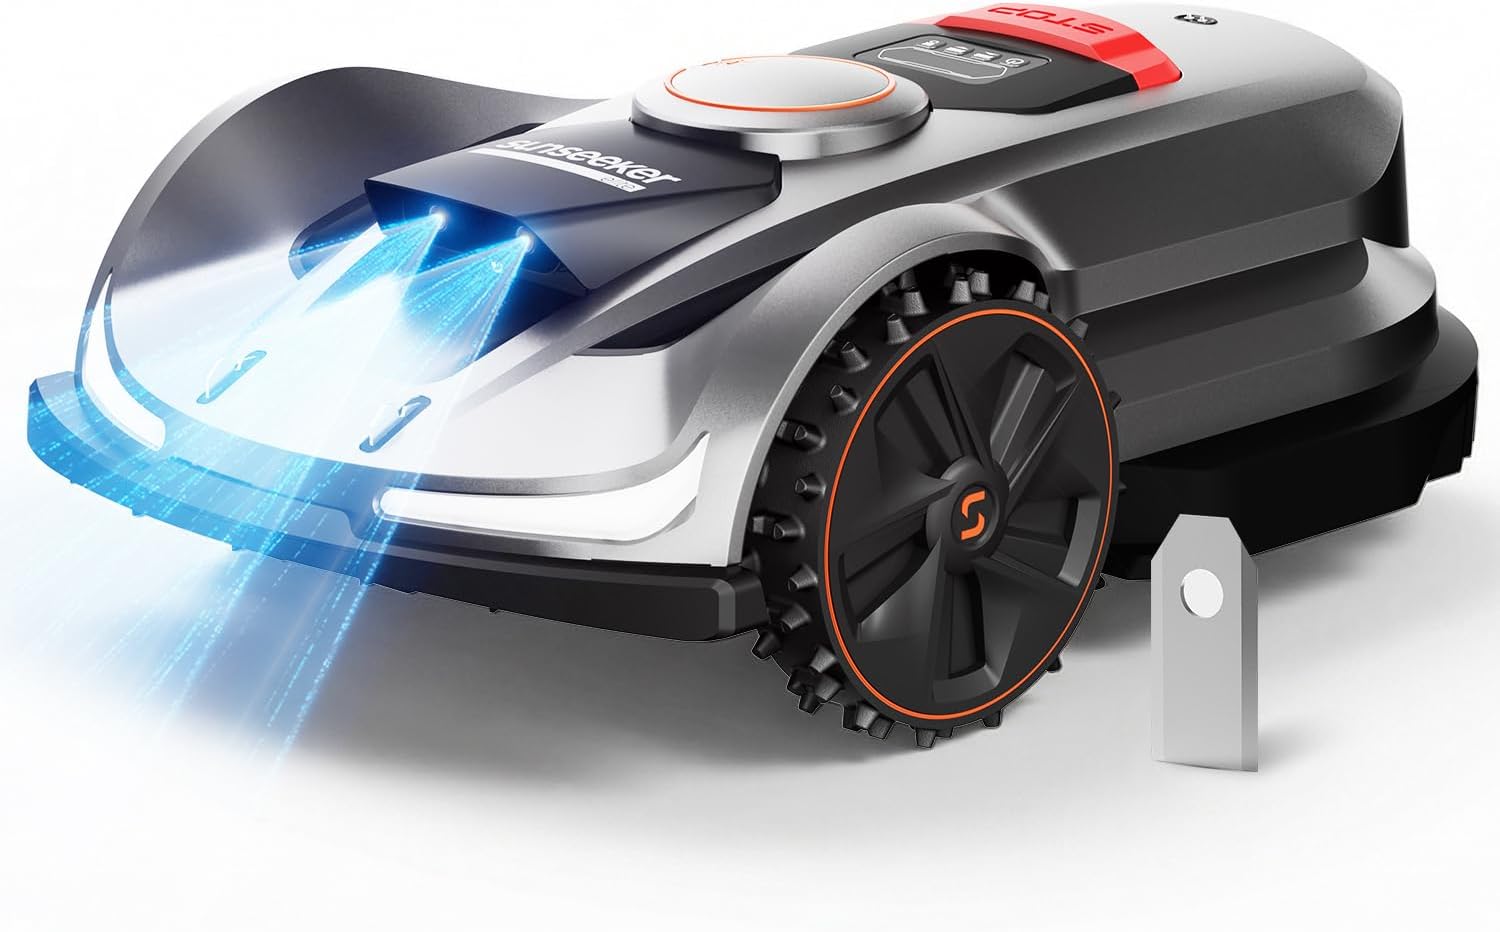
Best for a big, uneven yard: Sunseeker X7 AWD Robot Lawn Mower, RTK, Vision AI, 0.75 Acre, Wire-Free
 Visit on Amazon →
The X7 is the other end of the scale. The 0.75 acre rating and all-wheel drive put it in the class where a mower has to climb a real slope, cross a rough patch of lawn, and still get home. On my clients' properties, AWD is the difference between a mower that handles a wet Minnesota spring and one that spins a wheel and digs a divot.
Same wire-free approach: RTK for position, Vision AI for the edges and the obstacles. Setup follows the identical order as the Navimow, just with more boundary to walk and more zones to split. If your lot has a grade, a long run, or a stretch of lawn that stays soft after rain, this is the category to shop in.
Flaws but not dealbreakers: Big coverage ratings invite overbuying. A 0.75-acre machine on a quarter-acre lawn is a lot of robot for the job, and it will not mow any better than the smaller unit, it will just do it with more margin on a steep hill.
Anyone with a genuine half-acre or more, or a yard with a slope that eats lesser mowers, should look here first.
Before install day
Do these four things the week before, and setup day goes from frustrating to routine.
Mow the lawn short first. Map a lawn that is already at cutting height, not one that has gone two weeks without a cut. Tall grass hides the real edge and confuses the vision system during the boundary walk.
Clear the yard. Dog toys, hoses, the kid's bike, the garden edging that has heaved up over winter. A vision mower will avoid most of it, but every obstacle you remove is one less stall.
Pick the dock site in daylight, with the sky in mind. The dock needs open sky above it for the RTK fix, a level pad, and power within reach of an outdoor outlet. Do not tuck it under a deck or hard against the north wall of the garage.
Draw your map on paper. I use string and stakes on site, but for a homeowner, a phone photo with the zones marked in a notes app is enough. Know where the beds, the tree rings, and the no-go strips are before you start walking.
The actual setup workflow
Step one: Place and level the dock. Level matters more than location. A dock that tilts means the mower docks at an angle, and a mower that docks at an angle misses the charging contacts in the dark. Pack the pad with sand or set it on a paver if the ground is soft.
Step two: Power up and let it find the sky. Give the mower a full charge and let the RTK receiver sit at the dock for a while before you map. You want a solid fix before you start recording a boundary. If the app shows a weak signal at the dock, move the dock before you do anything else.
Step three: Walk the boundary once, slowly. Drive the mower around the edge of the lawn at a walking pace, keeping it on the actual grass edge. Do not cut corners to save time. Every shortcut becomes a strip of unmowed grass you will be trimming by hand all summer.
Step four: Set the virtual boundaries and no-go zones. Now you mark the beds, the tree rings, the gravel path, and the strip along the fence where you do not want the deck to scrape. This is the part wire-free mowers do better than wire systems: you can redraw a no-go zone in the app in 30 seconds instead of moving stakes.
Step five: Split the lawn into zones. Front, back, side, and any area with different grass or different light. Multi-zone management exists so the mower does not cross the whole property to reach a corner. It also lets you send it to the back only on days when the front is wet.
Step six: Set cutting height. Start higher than you think. For a first cut on a lawn that has been mowed at three inches, set the robot to three inches and let it work down over a week. Scalping a lawn on day one is the fastest way to convince yourself robot mowers ruin grass.
Step seven: Build the schedule around frequency, not duration. This is the single most important setting. A robot mower is a mulching machine, and mulching works when you take a little off the top often. Daily cuts at a high setting beat a weekly marathon at a low one, every time, on every lawn I have installed.
Step eight: Watch the first three runs. Stay outside for them. You are looking for the mower clipping a bed edge, struggling on a slope, or hesitating in a shaded corner. Fix those with the map or the no-go zones now, while you still remember what the yard looks like.
Where wire-free setups fail
The dock is in the shade. This is the number one cause of "my RTK mower keeps stopping." If the antenna does not see open sky, the mower cannot hold its position. Move the dock.
The boundary was mapped too fast. A boundary drawn at jogging pace will be a few inches off in places, and those few inches show up as ragged edges and hand-trimming.
The slope rating was optimistic. I have watched a mower rated for a steep grade slide sideways on wet grass at a much gentler one. Slope ratings get tested on dry, firm turf. Wet Minnesota clay is a different surface. If your slope is borderline, buy the AWD unit or plan to keep that section for a walk-behind.
The app lost the map after a firmware update. It happens across brands. Keep a photo of your zone layout and your no-go zones in your phone. Redrawing takes ten minutes instead of an evening of guessing.
The blades dulled and nobody noticed. A dull blade tears grass instead of cutting it, and the lawn starts looking frayed at the tips. Check the blades monthly during the growing season, and keep spares on hand. A blade change should take five minutes with a screwdriver, not a special tool and a manual.
The mower cannot find the dock in the dark. If your schedule runs into dusk, watch a docking cycle at night once. If it hunts, adjust the dock position or shorten the working window.
What this all costs
The mower is the visible cost. The invisible ones are the dock pad, an outdoor outlet if you do not have one near the lawn, replacement blades, and the hour you spend remapping after a landscaping project moves your beds.
Against that, a wire install costs you a weekend of trenching or edging, plus a splice kit and the ongoing fun of tracking down a break in the wire two seasons in. That is the trade wire-free is making: you pay more up front for the mower and skip the labor and the corrosion.
For a quarter-acre lot, I would put the Navimow i105N at the top of the list. For a half-acre or more with a grade, the Sunseeker X7 AWD. Both are set up with the same eight steps above, and both reward the same habit: run them often, keep the blades sharp, and leave the dock in the open.
Do the mapping walk once, carefully, on a dry afternoon. That afternoon is the whole install, and it is the difference between a mower that cuts your lawn every day and a very slow robot that parks itself in a flowerbed.