
Most robot mower complaints have nothing to do with the robot. They come from a robot lawn mower setup that got decided in twenty minutes on a Saturday: a dock jammed under a downspout, a boundary line running straight over a root, a return path that crosses the exact spot where the dog drops a tennis ball every night. I have watched this play out on client lawns for fifteen years, and the pattern never changes. The mower gets blamed. The install was the problem.
I am Ingrid. I spent fifteen years installing lawns around Minneapolis before I moved into reviewing robot mowers, and I have put more than thirty of them into client yards. My own lot is 0.4 acres with a slope that turns slick in May, a garden bed on three sides, and a dog who treats anything with a spinning blade as a challenge. Six different mowers have run through two full Minnesota seasons on this property, which means I have done the spring install, the summer clog, and the winter storage routine more times than I want to count.
The workflow below is the one I use, in order. It assumes you have already chosen a machine. If you have not, the two items further down are where I would start.
Why you should trust me
I keep a string and stakes map of every install I have done since 2016. Not a digital file, an actual drawing on graph paper with the steepest point marked in red and the places where a mower stalled circled. That habit came out of a client lawn in Edina where a machine kept beaching itself on a rise that looked flat from the kitchen window. The map found the problem in ten minutes. The app never would have.
I also keep a dated list of predictions and score it every January. Two entries from the current list: RTK-only mowers will keep failing under tree cover until the market settles on hybrid positioning, and blade technology will be the next premium tier, with self-sharpening blades sold as a feature rather than a consumable. The first one is holding up. The second is still early.
What I do not do is sell mowers. Nobody pays me to like a brand. When a client asks which machine to buy, I ask for a sketch of their yard first, because the answer depends on the shape of the property and not on the badge on the front.
How I picked and how I tested
This is not a buyer's guide. It is the setup that happens after the box arrives, and the two items below are the ones I would put in your hands before you cut the first stake hole.
My method for judging any mower is to ignore the spec sheet for the first week and watch the yard instead. A slope rating means nothing until the grass is wet. A wire-free claim means nothing until you see whether the machine holds a fix under a maple canopy in July. What I record is boring and useful: how many times it failed to dock after dark, how many times it needed a rescue, how long the blades lasted before the grass started looking torn instead of cut, and whether the schedule survived a firmware update.
Frequency beats quality. A cheap robot running daily outperforms an expensive one running weekly, and if the schedule breaks, you own a very slow Roomba. The two things I actually trust are how often the mower runs and whether it finds the dock in the dark. Everything else is marketing.
Two things to have before install day
You cannot plan a boundary around a yard you have not walked. Get the layout right first, then the machine and the reference material below will do their jobs.
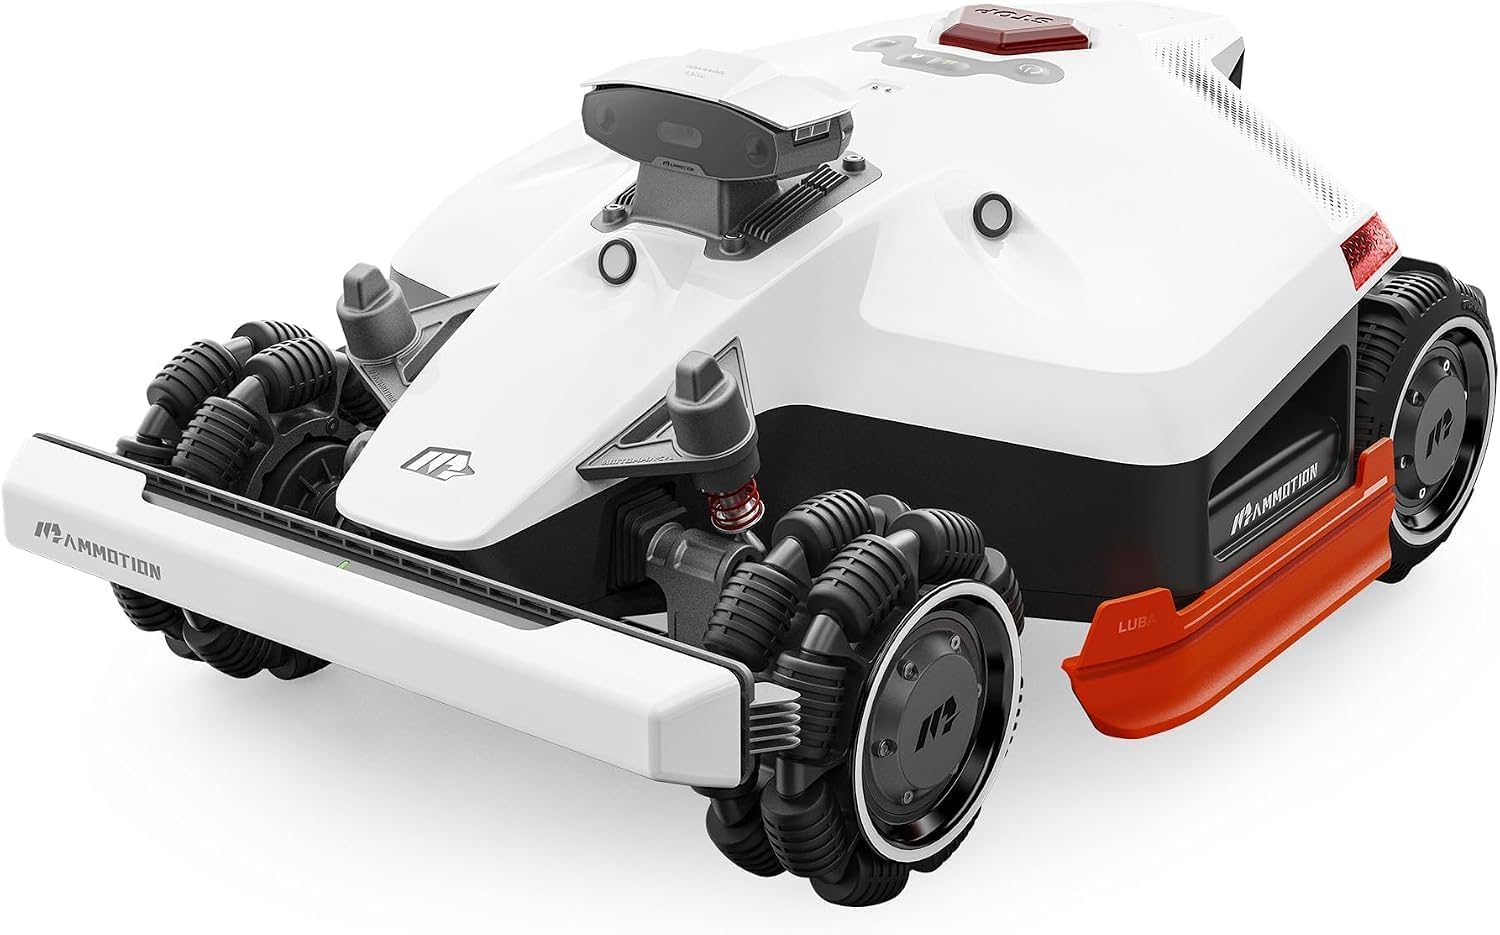
The machine for hard yards: Mammotion LUBA 2 AWD 3000HX Robot Lawn Mower with 4G, All-Wheel-Drive for 80% Slope, Perimeter Wire Free for 0.75 Acre, UltraSense AI Vision & RTK Auto-Mapping, 2.2"-4.0" Adjustable Cutting Height
 Visit on Amazon →
This is the class of machine I point at when a yard has a real slope and a client who does not want to trench. All-wheel drive is the part that matters, because traction on a hill is a function of how many wheels are pushing, not how confident the box looks. The manufacturer lists the LUBA 2 AWD 3000HX as rated for 80% slope, and I treat every slope figure as a claim until I see the same hill wet, in May, with clippings on it. That is when a machine either climbs or slides sideways.
The other headline feature is the perimeter-wire-free design, which here means RTK positioning plus UltraSense AI Vision, with 4G for connectivity and auto-mapping. That combination is genuinely useful on an open 0.75 acre lot, and it saves you the weekend of stapling wire. What it does not do is solve tree cover. RTK needs a clear view of the sky, and a mature maple canopy in July is the enemy of a clear view. The vision system helps the machine understand obstacles, but it does not manufacture a satellite fix.
The cutting height range runs 2.2 to 4.0 inches, which is a real adjustment band rather than a token one. That range is what lets you start high in spring and step down as the season settles, which is the single best thing you can do for grass health. Check current Amazon price before you commit, because this tier moves.
Flaws but not dealbreakers: A wire-free machine still has an install. You are trading stakes and wire for dock placement and signal planning, and you have to be honest about canopy. If half your lawn sits under trees, this is not the shortcut it looks like.
The reference to read first: The Robotic Lawn Mower Owners Handbook: The Real-World Guide for Managing Complex Yards, Maximizing Efficiency, and Eliminating Edging with Robotic Mowing (The Evolution of Lawn Care Series)
 Visit on Amazon →
The cheapest line item in a robot mower system is almost always the one that prevents the expensive mistakes. This handbook is written for the yards that do not cooperate: odd shapes, beds on multiple sides, a slope in the wrong place. The three promises on the cover are managing complex yards, maximizing efficiency, and eliminating edging, and the last one is the one people underestimate. Edging is where most robot mower owners end up back on their knees with a string trimmer, and it is usually a boundary layout problem, not a mower problem.
Read it before install day, not after. Check current Amazon price.
Flaws but not dealbreakers: It is a book, not a service. It will not tell you where your specific downspout is. You still have to walk your own property with stakes.
The actual setup workflow
Now the part you came for. This works whether your boundary is wire or RTK, and it works on a quarter acre or an acre.
Step one: Walk the yard with string and stakes. Do this before you buy anything, or at least before you open the box. Mark the steepest point, the wettest corner, the places the dog patrols, and the line where the tree canopy closes over. That last one decides your positioning method for you. If you cannot see sky, do not buy a system that needs it.
Step two: Pick the dock location first. This is the step everyone does last and the one that causes the most grief. The dock needs power, flat ground, clearance on both sides, and a sensible return path. Put it at the end of a narrow strip and you have built a parking problem into the system. Think about the dark: a mower that can find the dock at 10 p.m. in October is a mower that works.
Step three: Decide your boundary method honestly. Wire is boring and it works. RTK is elegant and it fails under a maple. Hybrid systems that combine both exist for exactly this reason, and I expect the market to settle there. If your property is open and flat, wire-free is a real time saver. If it is not, stop fighting your own trees.
Step four: Lay the boundary with real margins. Do not run a line tight to a fence or a bed edge. Leave the machine room to approach, turn, and leave a clean strip. Corridors matter more than boundary length. A narrow gap between a bed and a wall is where machines stall, so either widen it or close it off.
Step five: Set cutting height before the first scheduled run. Start higher than you think you should and drop a notch per week. On an adjustable machine like the LUBA 2 AWD 3000HX, that means starting near the top of the 2.2 to 4.0 inch band in spring. Scalping in May invites weeds and stresses the grass going into summer.
Step six: Schedule daily, not weekly. Mowing frequency beats mower quality every time. Daily cutting takes a sliver off each blade and returns it as mulch. Weekly cutting shocks the grass and leaves clumps that jam the deck.
Step seven: Watch the first three runs and take notes. Where it stalls, where it spins, where it climbs, where the dog interferes. Write it down on your map. The first week tells you everything the spec sheet hid.
Step eight: Handle the season change. Clean the dock contacts, check the blades, and re-verify the map after every firmware update. Apps lose maps, and a mower that forgets its boundary is a mower you have to re-teach. Before winter, store the machine dry and charge the battery to the level your manual recommends.
A caveat on blades. Blade life is the hidden cost of ownership. Dull blades tear grass instead of cutting it, and torn tips brown out and invite disease. Replace them on schedule, and avoid any blade system that needs a special tool, because you will stop doing it.
The competition and why it lost
The wire-based European machines from Husqvarna and Gardena still have the deepest reliability record, and for a client who wants a decade of boring performance, that matters. Their apps are conservative, which I consider a feature. The tradeoff is the install: you are trenching or stapling, and that is a weekend of your life.
The RTK-only newcomers are the opposite. Beautiful install, no wire, and a bad July under a mature canopy. I have watched a machine sit and think about its position for twenty minutes under a maple while the grass grew.
The hybrid approach, wire for the tricky zones and positioning for the open ones, is where I expect the category to land. It is not glamorous. It is correct.
Zero-turn mowers are not in this conversation at all. Different machine, different buyer, and no amount of clever docking makes a riding mower into a robot.
What this all costs
The mower is the big line item, and the tier that actually works for a real yard with a real slope is not the entry tier. Check current Amazon price on the machine you are considering rather than trusting a number you saw last season, because this market moves fast and the price you remember is probably wrong.
Then add the honest extras: boundary wire and stakes if you go wired, replacement blades as a recurring consumable, and the reference book, which is the smallest line on the list and the one that saves you the most. The install itself costs you a weekend if you do it yourself.
Run the math over five seasons instead of one. A mower that runs daily for six months a year is doing roughly 180 cuts you are not doing. That is the number that matters, not the sticker. Do the layout once, do it properly, and the machine will spend the next five years proving it.
That is the job. Your yard was never the problem. The plan was.