
Most people buy the mower first and plan the yard second. That order is why so many robot lawn mower setup projects end with a machine parked in the garage by August and a spool of boundary wire still coiled in the box. The mower is the easy part of the decision. The layout is the hard part, and nobody at the store sells it to you.
I have installed more than 30 of these for landscape clients, and I have run six of them on my own 0.4-acre lot through two Minnesota seasons. This guide is the version of the install conversation I have with every client: the numbers to measure before you order, where the docking station goes, how to lay a boundary that survives frost heave, what cutting height to start at, and the slope reality check that decides whether your mower finishes October or spins its wheels in the mud.
Why you should trust me
I spent 15 years installing lawns before I moved into reviewing robot mowers, so I came to this category from the dirt side, not the gadget side. More than 30 installs later, I can tell you the failure mode is almost never the robot. It is the layout: a wire run too close to a bed edge, a dock on a slope, a cutting height set for July in May.
I live outside Minneapolis on 0.4 acres with a slope that runs to the street, a garden island, and a dog that treats anything with wheels as a chase toy. I have run six different robot mowers through two full seasons here, including winter storage, spring reinstalls, and the mulberry leaf clog of 2024. I keep a string and stakes map of every install, mine and my clients'. That map is what I re-check in July when a mower starts nicking the same garden bed it ignored in May.
What I check before I recommend a mower
I do not hand a client a verdict on a mower I have not watched run through a wet spring, and I say so when I have not. What I can tell you is the checklist I run, in order, before a unit goes on a recommendation list.
Real mowed area, not lot size. A mower rated for 0.15 acre is rated for 0.15 acre of grass. A 0.4-acre lot with a house, a driveway, and beds might have 0.2 acres of actual turf. Measure the grass.
Boundary system. Wire is boring and it works. Satellite-based systems are elegant and they fail under a maple canopy. Ask which one the mower uses and whether it can fall back on the other.
Slope handling, specifically the sideways kind. Most ratings are tested on dry turf. Wet grass is a different surface.
Blade access. If changing blades needs a special tool or a disassembly video, the blades will not get changed, and a dull blade tears grass instead of cutting it.
The app. Scheduling is the whole product. If the schedule drifts after a firmware update, you own a very slow Roomba.
Dock placement flexibility. The mower has to find the dock in the dark, every night, for years. That is a layout question more than a software question.
The four numbers to measure before you order
Get these before you buy. Any one of them can change which mower you should own.
- Mowed square footage. Walk the lawn with a measuring wheel or a phone app and add up the grass, not the property.
- Worst-case slope, measured in the worst 20 feet. Not the average slope of the yard. The steepest short run the mower must cross, and the direction it crosses.
- Narrowest gap. The tightest spot between the house and a bed, or between two beds, that the mower has to pass through. If it is under about 3 feet, plan the layout around it.
- Obstacle count. Trees, hose reels, downspout extensions, dog toys, the kid's soccer goal. Every one of them becomes a boundary decision.
Write those four numbers on paper before you open a product page. They will save you a return.
Two mowers that fit a real install plan
Both of these are on my short list for a suburban yard this fall, for different buyers.
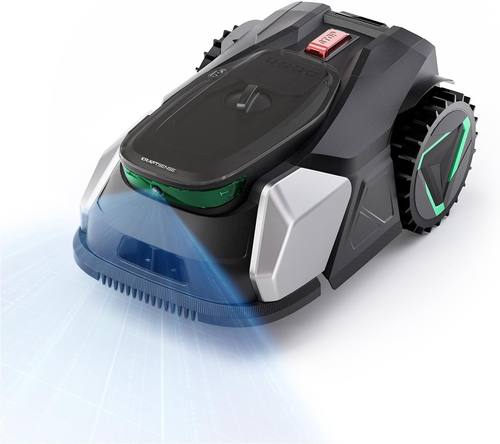
Budget pick: 20V Brushless Robotic Lawn Mower
 Visit on Amazon →
The reason I look at a brushless motor first is heat and life. Brushed motors wear at the brushes; brushless units run cooler and typically last longer between service intervals, which matters when the machine is running daily from April to October. The 20V battery platform in the name also suggests a swappable pack, and swappable is good: a battery you can replace in year three is cheaper than a mower you replace in year three.
What I would verify on the listing before ordering: cutting width, cutting height range in inches, the maximum slope it claims, and whether it uses a boundary wire or a satellite fix. Those four specs decide whether it fits the four numbers you just wrote down. For a flat quarter acre with a simple rectangle and no garden islands, this is the class of mower I would start with.
Where it falls short: a lighter-duty unit like this is not the one I would put on a yard with a steep run to the street, and the smaller deck means more passes and a longer daily run time. On a yard that needs daily mowing to stay ahead of growth, run time matters more than people expect.
Our pick: Segway Navimow i206 AWD Robot Lawn Mower, New i105N, 0.15 Acre, 45% Slopes
 Visit on Amazon →
The all-wheel-drive part of the name is the part I care about. Traction is what keeps a mower from sliding sideways on a wet slope, and all-wheel drive is a real answer to that problem in a way that a software setting is not. The name also advertises 0.15 acre of coverage and a 45% slope rating, which puts it in the size class of a typical suburban front and back yard rather than a half-acre spread.
Treat that 45% number the way I treat every slope rating: as a dry-turf figure. I have watched a mower rated for 25% slide sideways on wet grass at 18%. If your steep run faces north and stays damp, cut the rating down in your head before you decide.
What I would verify on the listing: the boundary system it ships with, the cutting height range, the docking station footprint, and the replacement blade part number. Get the blade number now and save it, because you will need it in about a month of daily mowing.
Where it falls short: all-wheel drive adds weight, and a heavier mower on a soft, wet lawn in early spring can rut the turf if you start the season too early. Let the ground firm up before you send it out.
Wire or satellite: decide the boundary before you dig
This is the fork in the road, and it is the decision I argue about most with clients.
Wire is boring and it works. A boundary wire carries a signal the mower follows, and it does not care about tree cover, cloud cover, or the height of your neighbor's garage. The catch is the install itself: you are running a loop around every mowed edge, staking it down or burying it, and the wire becomes a permanent feature of the yard. Splices are where wire systems fail, and a splice that corrodes in one season will strand the mower mid-lawn.
Satellite systems, usually RTK, drop the wire and use a fixed reference station plus positioning. When the sky is open, this is elegant, and the mower can be told to mow a shape rather than follow a loop. When a maple canopy closes over the yard, the fix degrades and the mower gets confused about where the edge is.
My rule: if you have heavy tree cover or a narrow side yard between buildings, plan on wire. If your lawn is open and you want the flexibility, satellite is worth trying, with the understanding that you may end up adding a wire later anyway. The market looks like it is heading toward hybrid systems that do both, and that is the version I would want.
The install workflow, step by step
Step one: map the yard with string and stakes
Run string around the mowed perimeter and stake the corners. This is the cheap, reversible version of your boundary. Walk it. Look for the places where the string crosses a root or clips a bed edge. Fix it on the string, not on the wire.
Step two: place the docking station first
The dock goes on level ground, on a firm surface, with a straight approach of several feet. Not at the bottom of a slope, where water collects. Not at the top of a slope, where the mower arrives too fast. Not under the downspout. The mower has to find this dock in the dark, in the rain, for years, so give it the easiest possible approach.
Step three: run the boundary with slack
Leave slack at every corner and every stake. Frost heave moves ground, and a wire with no slack will pull tight and break. Bury it where you can, stake it where you cannot, and keep the loop the same distance from the edge the whole way around. Inconsistent distance is what makes a mower miss a strip on one side of the yard.
Step four: pair the app and set the map
Pair the mower, let it learn the boundary, and then walk the map on your phone against the actual yard. If the map shows the mower cutting into a bed, fix the boundary now, not after a month of nicked hostas.
Step five: set cutting height high, then lower it
Start at the highest setting your grass type tolerates. Cutting too low in the first week stresses the lawn and exposes the soil, which is exactly what you do not want going into a wet spring. Lower it one notch per week until you reach your summer height.
Step six: schedule daily, not weekly
This is the single biggest lever you have. A cheap mower running daily beats an expensive one running weekly, because daily mowing takes a small amount off the top and leaves the clippings to break down as mulch. Weekly mowing takes too much off at once, and the clippings clump.
Step seven: supervise the first week
Watch the first few runs. Note where it hesitates, where it spins, where it misses. Every one of those is a layout problem you can fix in an hour now or live with all season.
Slope: the spec the box lies about
Slope ratings are marketing until proven otherwise. They are measured on dry turf, in a straight line, with a full battery. Your yard is wet grass, a curve, and a battery at 30%.
The two things that actually matter are the direction of the crossing and the surface. A mower crossing a slope straight up and down has traction and gravity on its side. The same mower crossing the same slope sideways is one wet leaf away from a slide. If your worst slope runs along the edge of the yard, plan the boundary so the mower crosses it vertically and turns at the top, not on the face.
And check the surface at the moment you plan to mow. If the slope holds water, morning dew makes it a different slope than the one in the spec sheet.
Where installs go wrong
The dock is on a slope. The mower arrives at an angle, misses the contacts, and dies two feet from home.
The wire has no slack. One hard frost pulls it tight and the loop opens.
The boundary hugs the bed. The mower clips the edge of the mulch, or worse, the plants.
The cutting height starts low. The lawn gets scalped in the first week and spends a month recovering.
The schedule is weekly. The clippings clump, the deck loads up, and cut quality drops.
Nobody saved the blade part number. Month two arrives, the blades are dull, and the mower starts tearing instead of cutting.
What this costs over a season
The purchase price is the visible cost. The real cost is time and consumables. Budget the install day, budget a blade change every few weeks of daily mowing, and budget the hour you will spend re-checking the boundary after the first hard freeze and thaw. A robot mower is a lawn system, not an appliance, and systems need a little maintenance.
The good news is that the maintenance is minutes, not hours, and it is the kind of work you can do in the driveway with a socket wrench and a coffee. Compare that to an hour behind a push mower every week and the math gets easy.
The short version
Measure the grass, not the lot. Measure the worst slope, not the average. Put the dock somewhere flat and easy. Run the boundary with slack. Start the cutting height high. Schedule daily. Supervise the first week.
Do those seven things and the mower you buy, whether it is the budget brushless unit or the all-wheel-drive Navimow, will finish the season instead of sitting in the garage next to the coiled wire it never used.